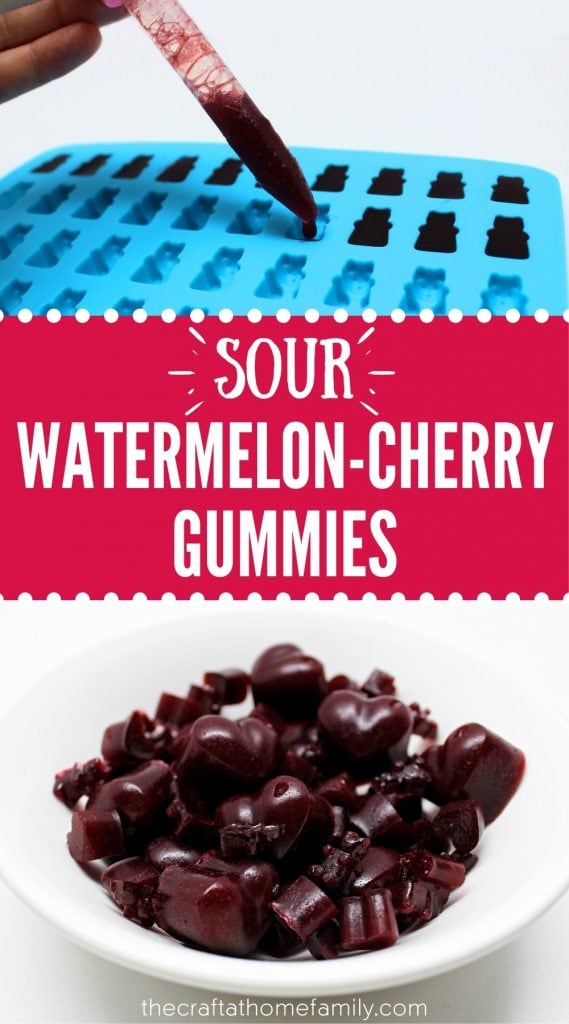
These deliciously sour gummies are made with real fruit and naturally sweetened with honey. Homemade fruit gummies are both healthy and simple to make—they’re an easy guilt-free treat, and you can even swap out the fruit to customize them however you like! Use heart-shaped moulds for a fun Valentine’s Day treat or turn your excess watermelon into a tasty summer fruit snack!
This post may contain affiliate links, which means I may receive a commission, at no extra cost to you, if you make a purchase through a link. As an Amazon Associate, I earn from qualifying purchases. Please see my full disclosure for further information.
JUMP TO…
I’d be lying if I said I didn’t have a sweet tooth. But unfortunately for me, I don’t do terribly well with traditional sweets.
I’m not sure whether it’s possible to have an intolerance to refined sugar, but if it is, I definitely have one. Store-bought candies and baked goods give me a headache almost instantly, and even tea that’s been sweetened with granulated sugar makes me feel a little ill. (Especially if it’s fully caffeinated—I don’t do so well with caffeine, either!)
Thankfully, there are tons of ways to create homemade recipes that can satisfy one’s sweet tooth without the use of refined sugar. And most of them taste just as good as traditional recipes… while also being a whole lot healthier!
These homemade gummies fall into that category. Not only do they taste way better than store-bought gummies, but they also happen to be naturally sweetened and made with real fruit! They’re super simple to make and way healthier than what you can find at the store.
This makes them perfect not only for people who need or choose to avoid refined sugar, but also for parents looking for healthier treats to give to their children!
Required Ingredients
Here’s what you’ll need to make these delicious, naturally sweetened gummies in just a few simple steps:
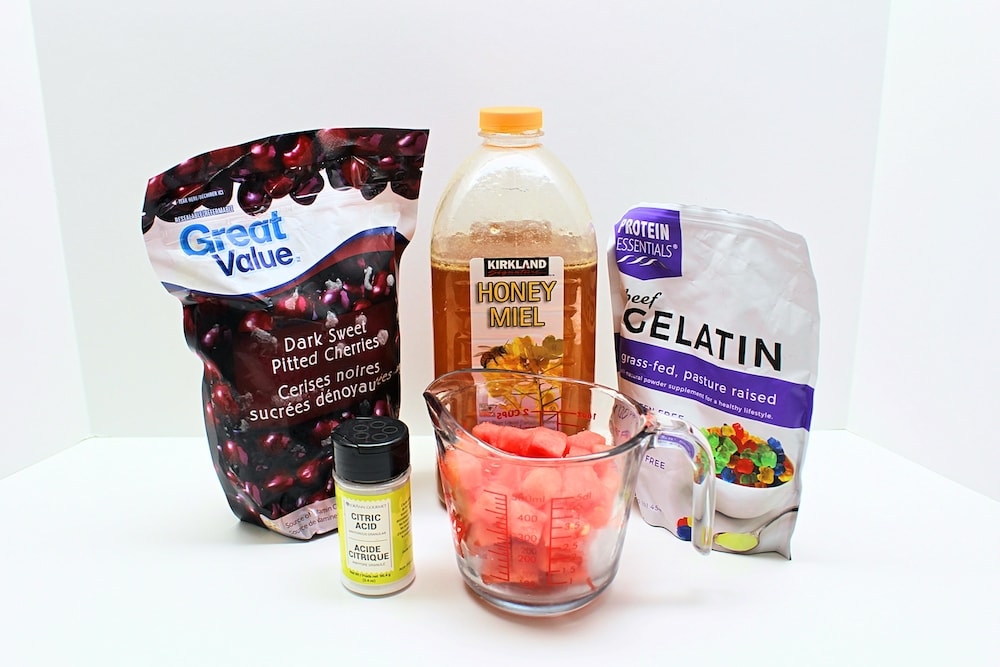
- Fresh watermelon
- Frozen cherries (or fresh cherries if you have them!)
- Honey
- Citric acid
- Unflavoured gelatin
The secret to making sour gummies is citric acid. Some recipes recommend coating the gummies in citric acid once they’re done setting, but I like to add it directly into the mixture to enhance the sourness of the gummies as well as the flavour of the fruit.
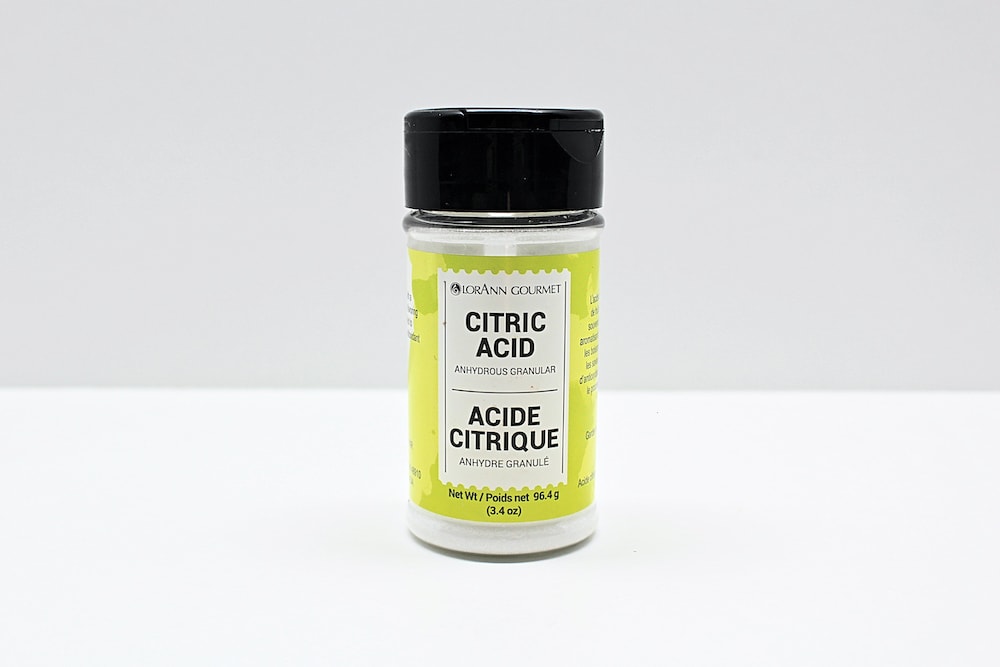
Of course, if you like your gummies extra sour, feel free to do both—but I’d recommend tasting them first since citric acid is very sour and a little goes a long way!
Required Equipment
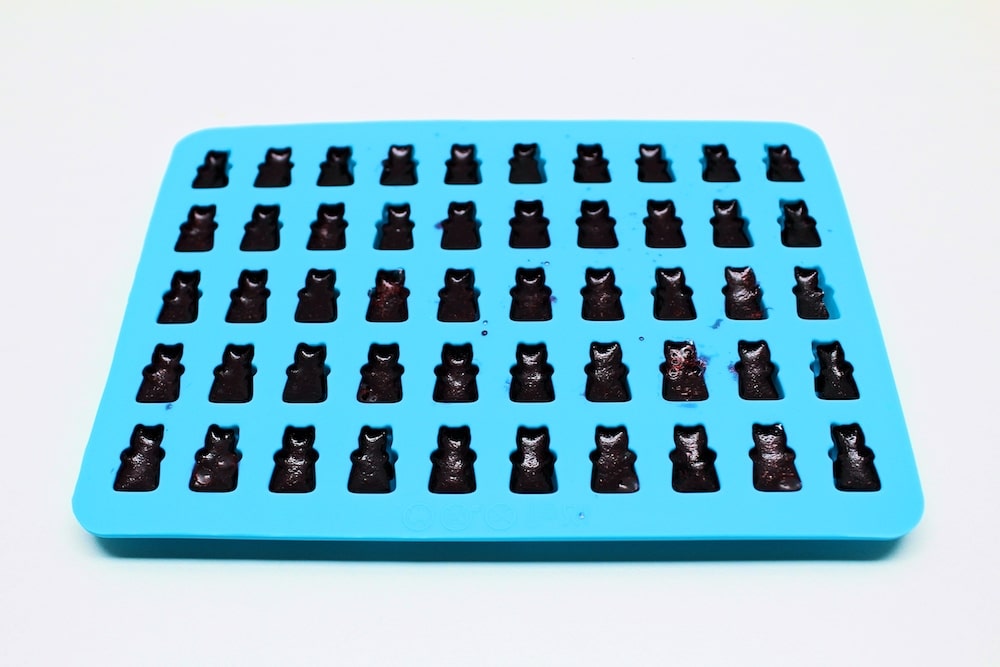
You won’t need any fancy equipment to make these gummies, and in fact, you could probably just let them set at the bottom of a casserole dish and cut them into cubes once they’re ready. But we like to use silicone moulds to give our gummies fun shapes!
We make a lot of homemade gummies, so we’ve accumulated a few different sets over time. Amazon has moulds in all sorts of different shapes that are suitable for everyday use, or even for specific seasons and holidays!
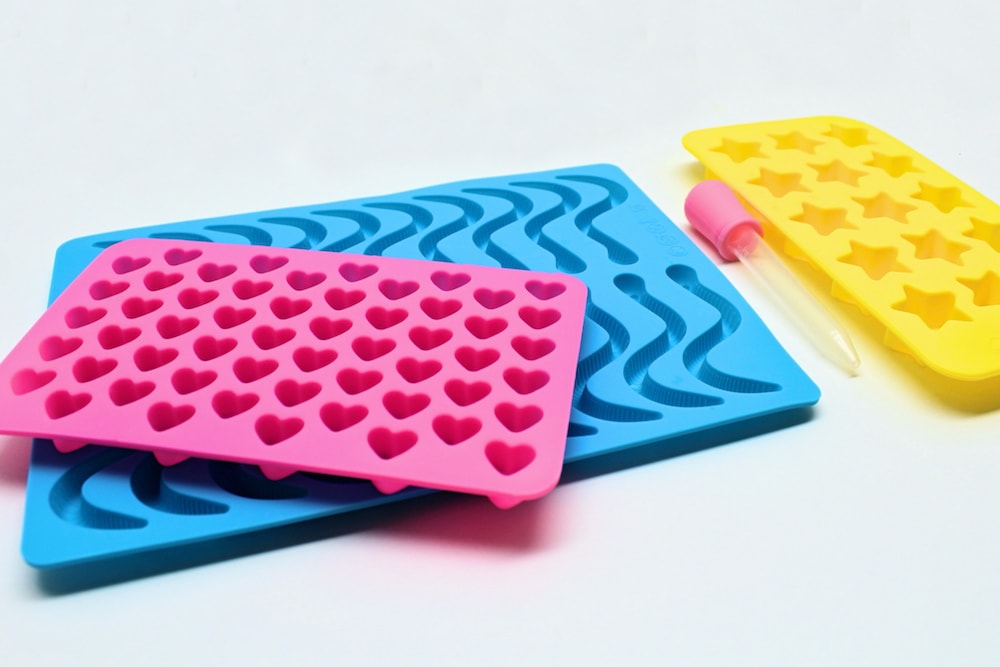
Bear-shaped moulds seems like an obvious choice, but we particularly love making gummy worms. We also like to switch things up by using a variety of different moulds for each batch of gummies!
For this recipe, you’ll also need:
- Blender or hand blender (I used my Baby Bullet, but you can use whatever you normally use!)
- Saucepan
- Wooden or silicone spoon
- Dropper (this should be included with the silicone moulds)
How to Make Sour Watermelon-Cherry Gummies Using Real Fruit (Step-by-Step)
1. Make Fruit Purée
Start by placing 2 cups of watermelon cubes and 1 cup of cherries (if using frozen, let them thaw first) in a blender. Let it run until the fruit forms a smooth purée.
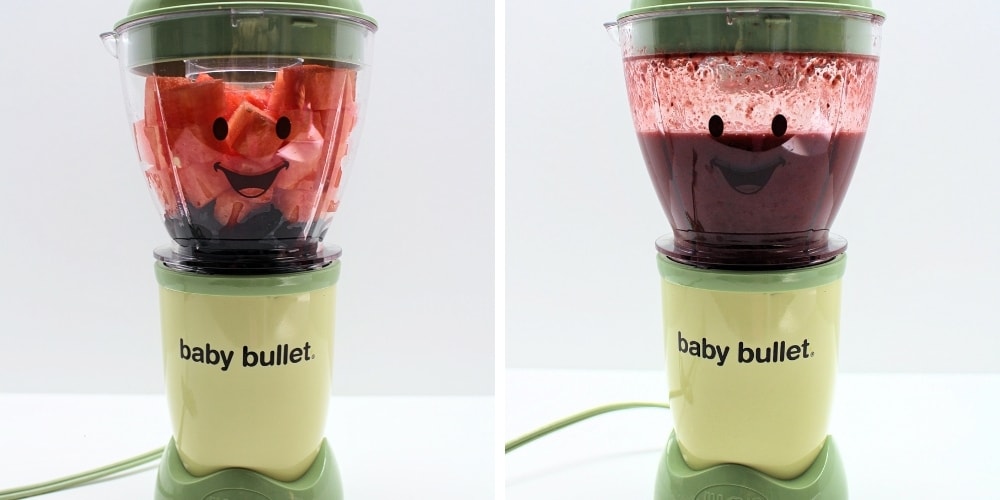
Note: I like to use our Baby Bullet for this because it’s smaller and easier to clean, but feel free to use a regular blender or even an immersion blender if that’s what you have!
2. Add Honey & Citric Acid
Add honey and citric acid, then run your blender for a few more seconds, until the ingredients are well combined. Taste the mixture and adjust the taste as needed.
Note: We used about 3 tablespoons of honey and ½ teaspoon of citric acid, but you may want to start with less, especially if you’ve never used citric acid before!
3. Add Gelatin
Pour the mixture into a small saucepan and add ½ cup of gelatin one tablespoon at a time, mixing well between each addition. (Note: ½ cup of gelatin = 8 tablespoons.)
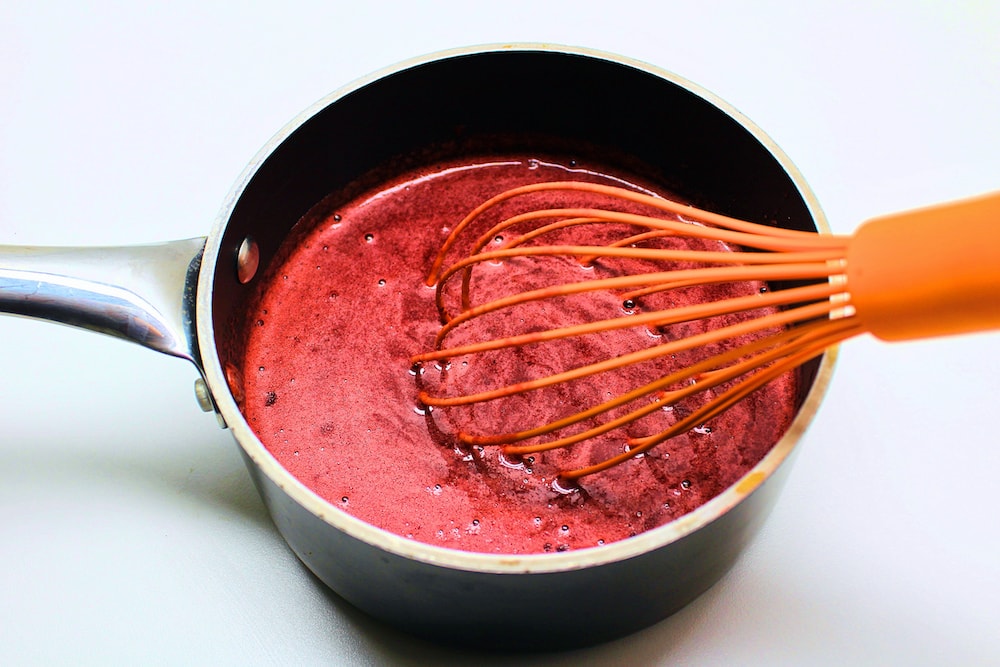
Make sure not to turn the heat on before completing this step. If you do, the powder will simply gel on top of the fruit mixture instead of dissolving and you’ll likely have to start the whole process over.
Tip: Gelatin does dull the flavour a little, so feel free to taste the mixture after the gelatin has been added and add a little more citric acid as needed to make your gummies nice and sour.
4. Cook Mixture
Once all the gelatin has dissolved, turn on the element on medium heat and cook the mixture, stirring constantly, until it starts to bubble. Then, remove it from the element immediately to prevent it from overflowing.
5. Place Mixture in Moulds
While the mixture is still hot, use a dropper to pour it into each of the cavities of your silicone moulds. (Most sets of silicone moulds include a dropper that you can use.)
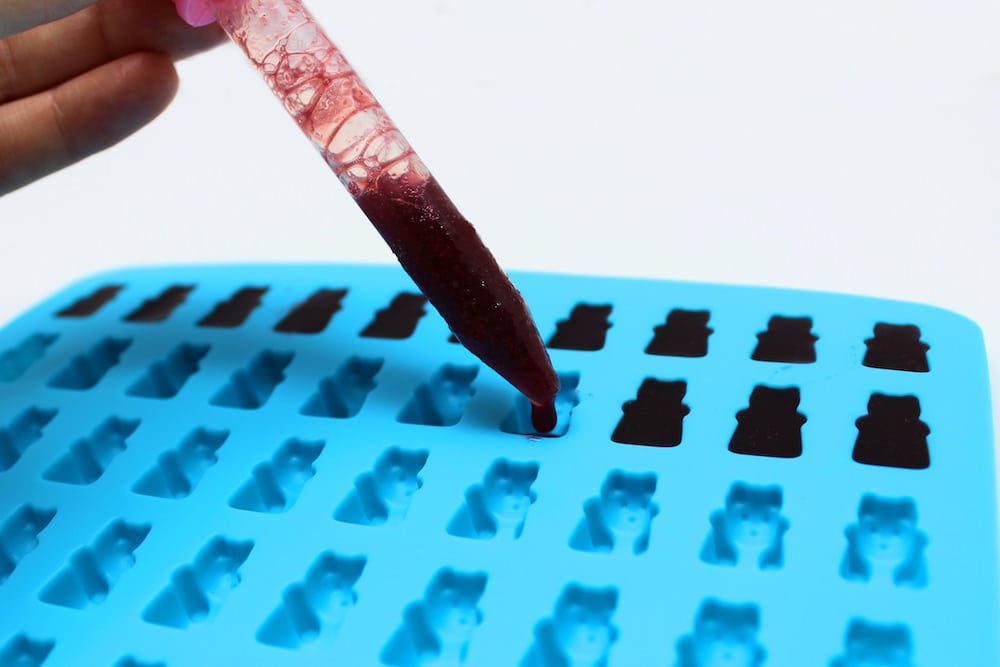
Alternatively, pour the mixture into a casserole dish.
6. Let Gelatin Set
Place the moulds or casserole dish into the fridge and let them set for a few hours, until the gummies are firm to the touch and easily pop out of the moulds.
7. Remove Gummies from Moulds
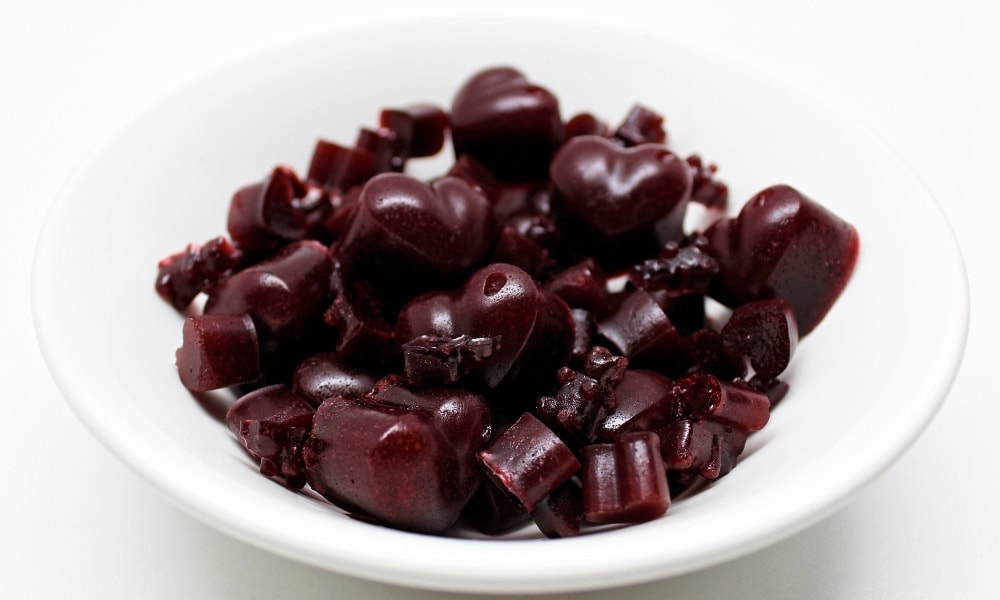
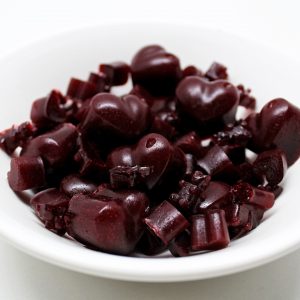
Once the gummies are finished setting, pop them out of their moulds and enjoy! (If you used a casserole dish, use a knife to cut the mixture into squares and pop them out that way.)
We usually store ours in an airtight container in the fridge, and they keep well for about a week (though it’s rare that they remain uneaten for that long!).

You can make these homemade gummies using all sorts of different fruit, but watermelon-cherry is definitely our favourite—and we’ve tried lots of different combinations!
Note: If you want your gummies to be extra sour, consider dusting them in citric acid! Simply place them in a bag or container, add some citric acid, then shake them around until all the gummies are coated. Remember, a little goes a long way!
Sour Watermelon-Cherry Gummies
Equipment
- Silicone gummy moulds
Ingredients
- 2 cups watermelon cubes
- 1 cup frozen (or fresh) cherries thawed
- 3 tbsp honey
- ¼-½ tsp citric acid to taste
- ½ cup (8 tbsp) unflavoured gelatin
Instructions
- Use a blender to purée the watermelon cubes and cherries.
- Add honey and citric acid and blend until well combined. Taste mixture and adjust quantity of honey or citric acid as needed.
- Place mixture in a small saucepan and stir in 8 tablespoons of gelatin, one at a time, until completely dissolved.
- On medium heat, cook mixture, stirring constantly, until it begins to bubble. Immediately remove from heat.
- While mixture is still hot, use a dropper to pour it into the cavities of the gummy moulds.
- Chill for a few hours, until gummies are firm to the touch and easily pop out of the moulds.
- Remove gummies from moulds and enjoy! Gummies can be stored in the fridge for up to a week.
Nutrition
Related Naturally Sweetened Recipes
Looking for more recipes that you can make at home using natural sweeteners? Check out this popular recipe:
Like gummies, iced cappuccinos are so easy to make at home—and a lot healthier than the store-bought kind!
Subscribe to for my newsletter to get my latest recipes delivered straight to your inbox! You can also tick the checkbox below to receive fun craft and activity ideas to do at home with your kids.
Only your name will be made public. Please note that by submitting your comment, you are agreeing to the terms of our Privacy Policy.