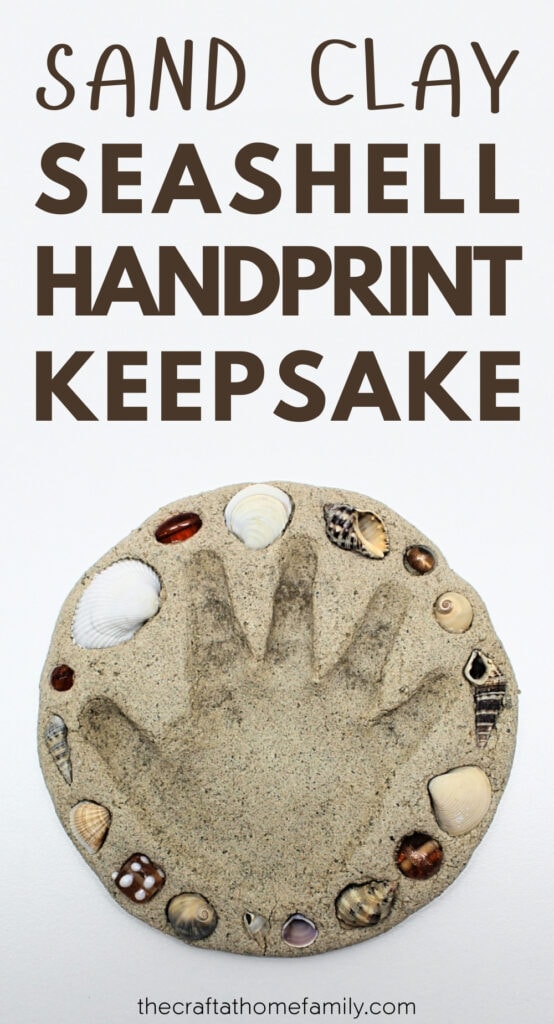
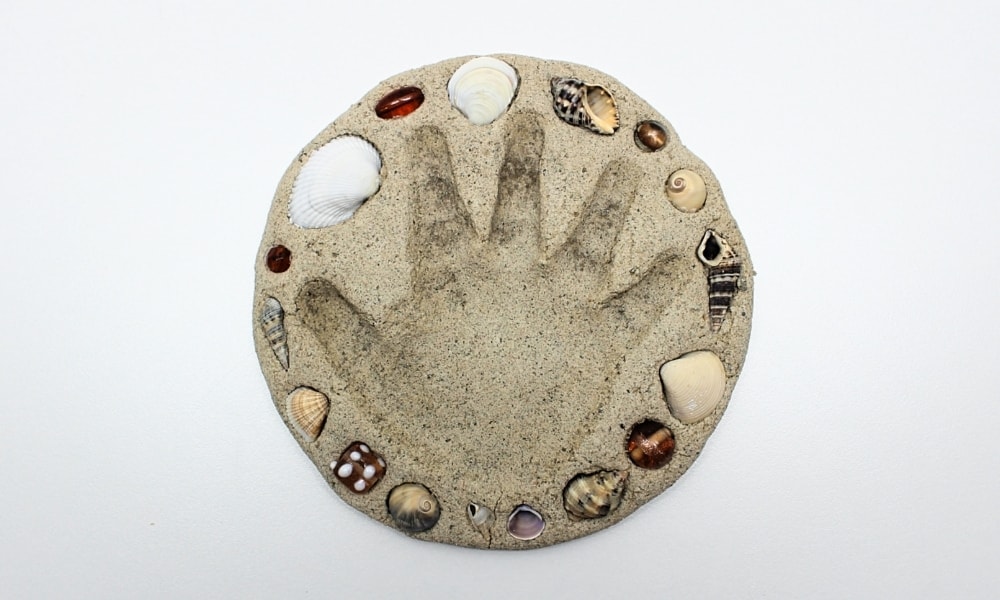
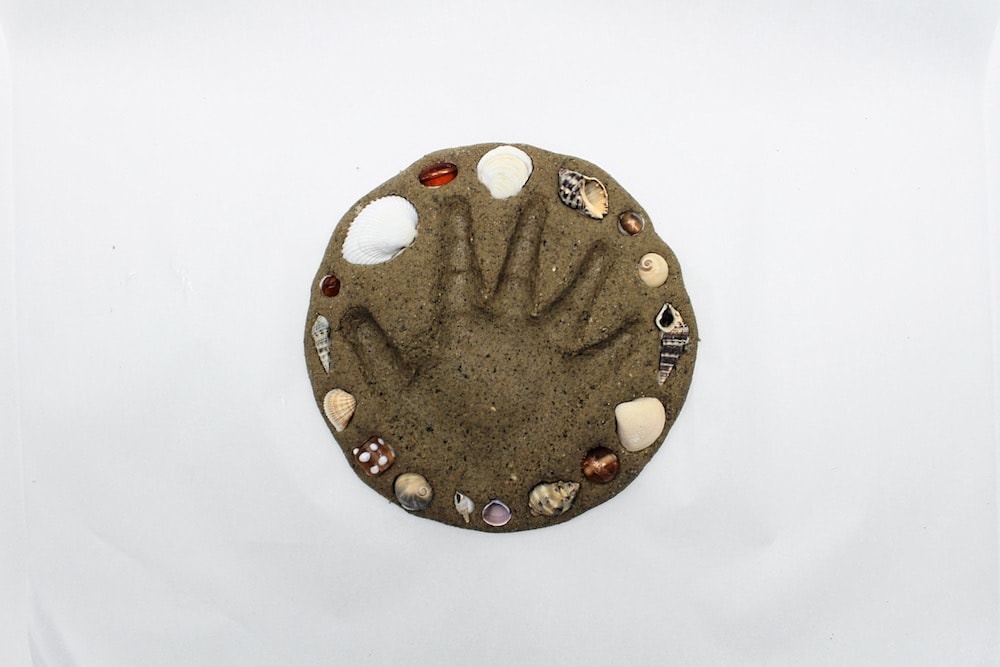
This gorgeous seashell keepsake made from homemade sand clay is the perfect way to create sweet summer memories with your kids! What better way to preserve your child’s tiny handprint and remember all the fun you had in the summer sun?
This post may contain affiliate links, which means I may receive a commission, at no extra cost to you, if you make a purchase through a link. As an Amazon Associate, I earn from qualifying purchases. Please see my full disclosure for further information.
JUMP TO…
As you can imagine, with four young kids at home, we’ve made our fair share of handprint keepsakes.
Whether on canvas, paper or salt dough, our kids love lending me their tiny hands to create artwork—and I love having lots of sweet mementos that I’ll be able to look back on when they’re grown!
We love hanging salt dough handprints on our Christmas tree, but the summer is just as great a time to create memories together. So why not use beach sand and seashells to create extra-special keepsakes that will remind you of warm sunny weather and family beach outings?
…And if ever you don’t happen to live near a beach (we don’t), not a problem! You can easily use sand from your sandbox and dollar-store seashells to create this lovely summer-themed keepsake with your kids!
Required Materials
Here’s what you’ll need to immortalize your little one’s tiny handprint in the form of a cute beach-themed keepsake!

For the sand clay:
- Play sand (we took some of the sand from our sandbox—just make sure to remove any large clumps and/or rocks)
- Flour
- Salt
- Water
Note: The quantities indicated in the recipe below should make enough sand clay for two handprint keepsakes. If you’re planning on making more than two, or if your child is older than ours and has larger hands, simply multiply the quantities accordingly.
For decorating:
- Seashells (we bought ours at the dollar store because we don’t live anywhere near the beach, but feel fee to use seashells that you collected yourself to make this keepsake extra special!)
- Decorative beads (optional)
- Elmer’s Glue-All (or another strong glue)
- Mod Podge or clear glaze (to seal the artwork and prevent cracks)
How to Make a DIY Sand Clay Keepsake with Seashells (Step-by-Step)
1. Combine Dry Clay Ingredients
Start by combining 1 cup of sand, ⅔ cups of all-purpose flour and ⅓ cup of salt in a small bowl and stirring with a spoon. (Double the quantities if you’ll be making more than two handprints.)

2. Add Water
Add ½ cup of water and stir until well combined.
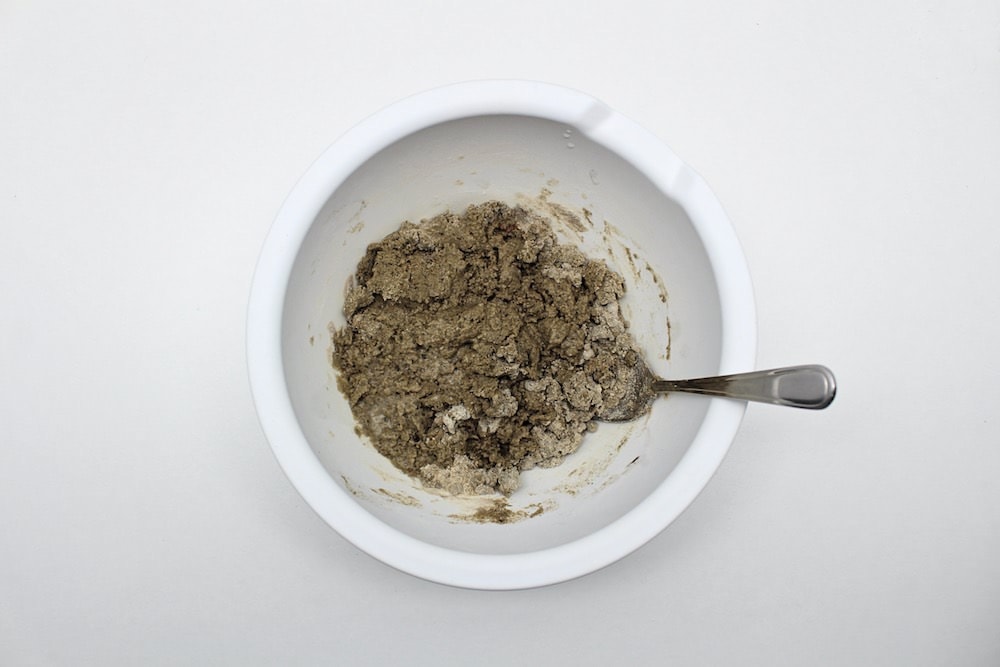
If, when you’re done stirring, the texture of the sand clay seems too wet, add a bit of flour. If it seems too crumbly, add a bit more water.
3. Knead Sand Dough
Knead the sand clay with your hands until it has a doughy texture similar to salt dough (though it will feel a bit rougher due to the sand).
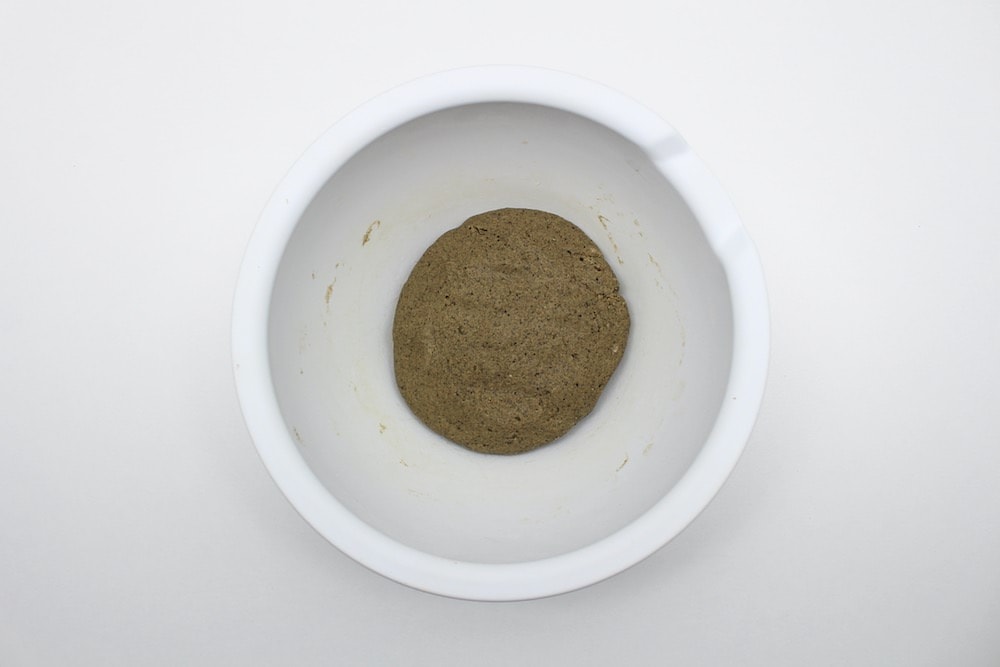
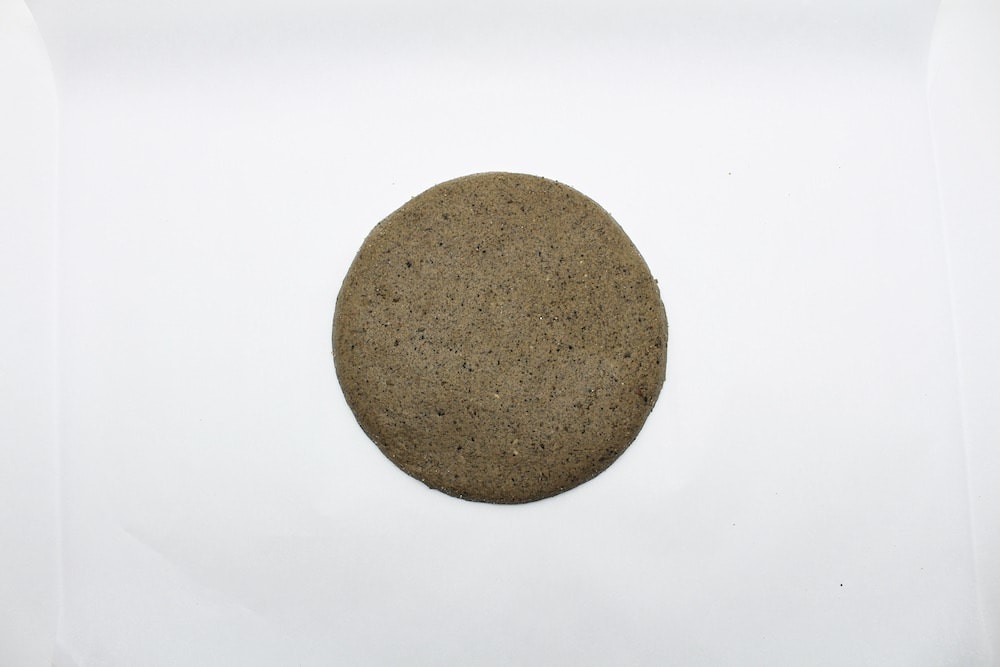
4. Shape & Flatten Sand Dough
Make a ball with your sand clay and flatten it using a rolling pin or your hands. I didn’t bother with the rolling pin, but I did make sure that the shape and texture of my sand clay disk were nice and smooth.
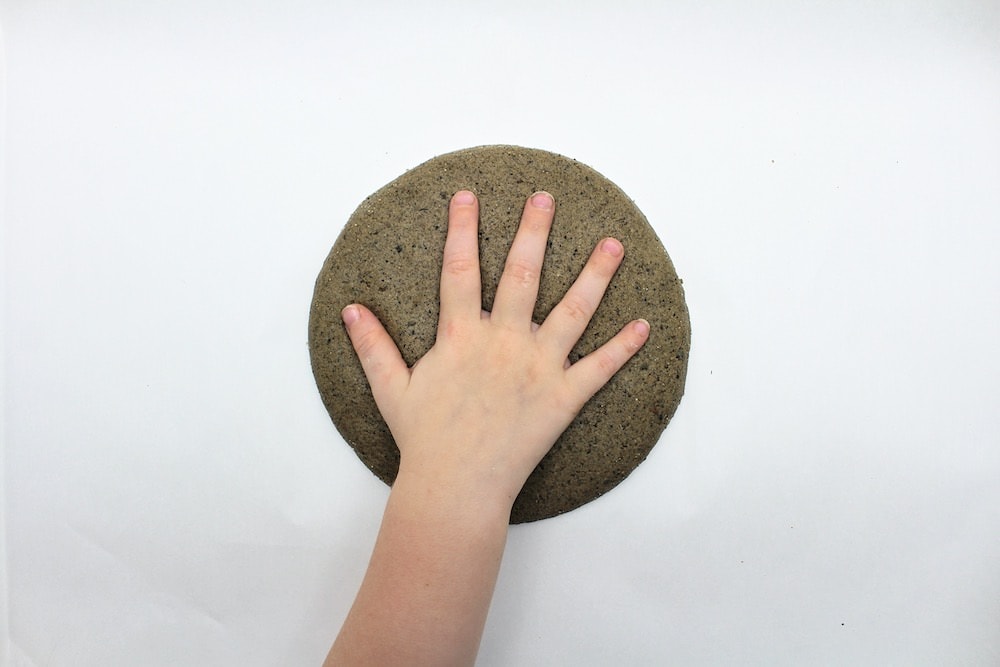
5. Create Impression
Have your child offer up one of their hands and press it into the sand clay. Make sure you press down enough to leave a deep imprint in the sand dough.
6. Position Beads & Seashells
Once the imprint is made, break out the seashells and beads (we went with earthy tones that complemented the seashells nicely) and place them all around the handprint without pressing down.
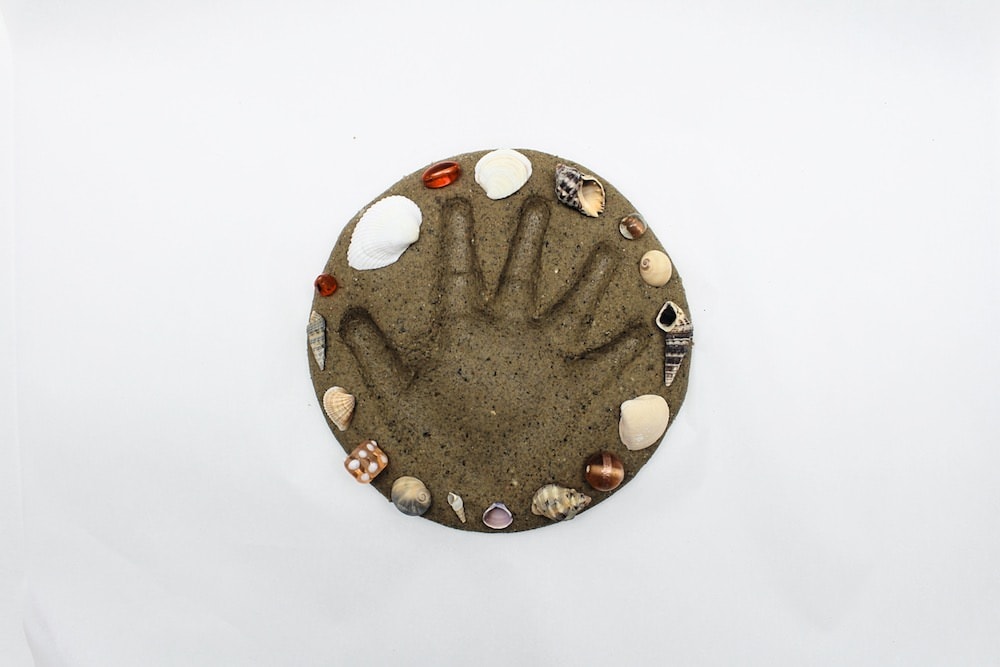
This will ensure that all the seashells and beads are perfectly positioned when comes the time to press them into the clay!
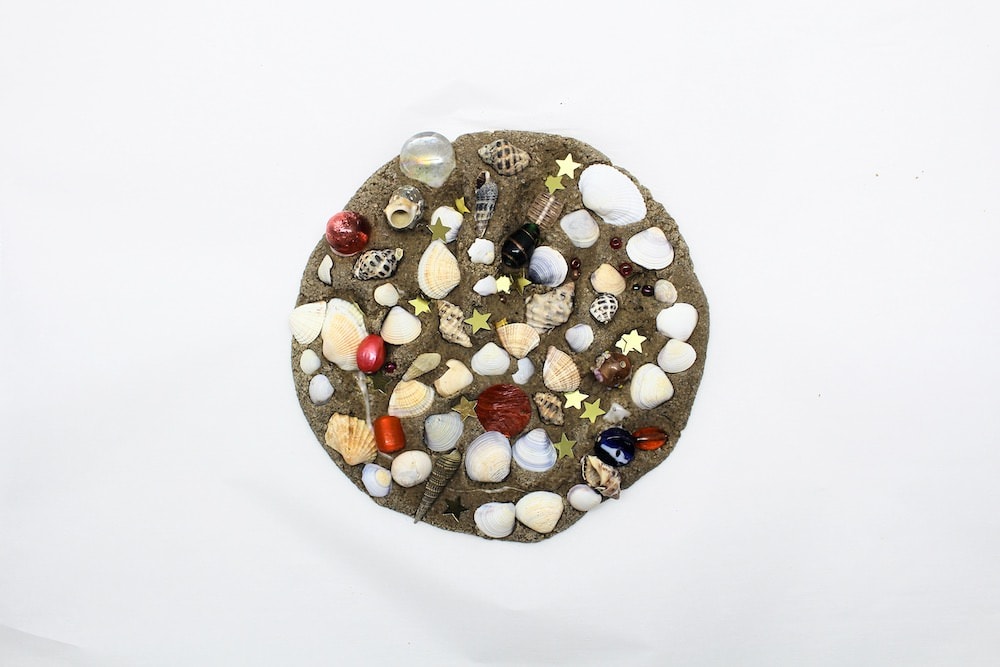
My five-year-old decided to make her own and went a little nuts with the beads and seashells. It’s hard to tell, but there’s actually a handprint hiding in there somewhere!
7. Glue Beads & Seashells
Once all the beads and seashells are where you want them to be, press them into the sand clay, adding a dab of Elmer’s Glue-All (or any strong glue) to ensure that they’ll stay where you want them to.
8. Let Dry
Let the clay dry completely—ideally by leaving it out in the hot summer sun, but you can also use your oven if that’s more convenient for you.
If you do use an oven, just make sure to keep it on its lowest temperature setting (ours was 170°F) to avoid melting the beads and releasing harmful fumes from the glue.
I did some research and couldn’t find a definitive answer about whether it was safe to put Elmer’s glue in the oven, so I wasn’t comfortable raising the temperature any higher than 170°F.
But regardless of whether you’re leaving it out in the sun to dry or placing it in the oven, make sure you flip it around about halfway through to allow the back of the keepsake to dry as well!
9. Add Glaze or Mod Podge (Optional)
Once the clay is completely dry, cover the front of it with Mod Podge or clear aerosol glaze in order to protect it and prevent it from cracking. This step is optional, but recommended—especially if you’re planning on keeping it for a long time!
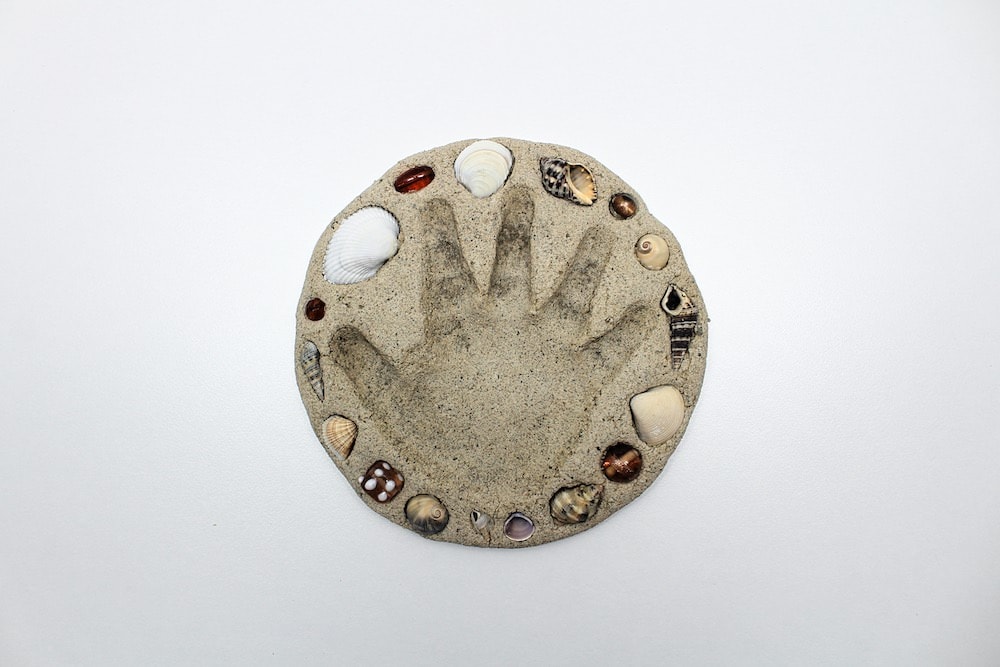
And that’s it! We just love how ours turned out and how different (and sandy) it looks compared to traditional salt dough. I hope that you love yours as much as we did ours!
Related Summer Crafts & Activities
Looking for more fun ways to make summer memories with your kids? Check out these articles:
- Butterfly Suncatcher (with Free Template!)
- DIY Pipe Cleaner Bubble Wands
- 25 Refreshing Summer Water Activities for Kids
You can also subscribe to my newsletter to receive fun craft and activity ideas right in your inbox! You’ll gain access to my free printables library as well as to fun bonuses that will never be available on my site!
Hey there, I was hoping you would give a small update on how your keepsake has held up! About to head to the beach for a day trip and want to make sure all goes well. Thanks!
Hi Kayla, the keepsake has held up perfectly! It’s been almost two years since we made it and we still have it. These are no cracks in it, and since we glued the beads and seashells in place, they all stayed exactly where they were. I hope you have fun at the beach and that your keepsake turns out great!