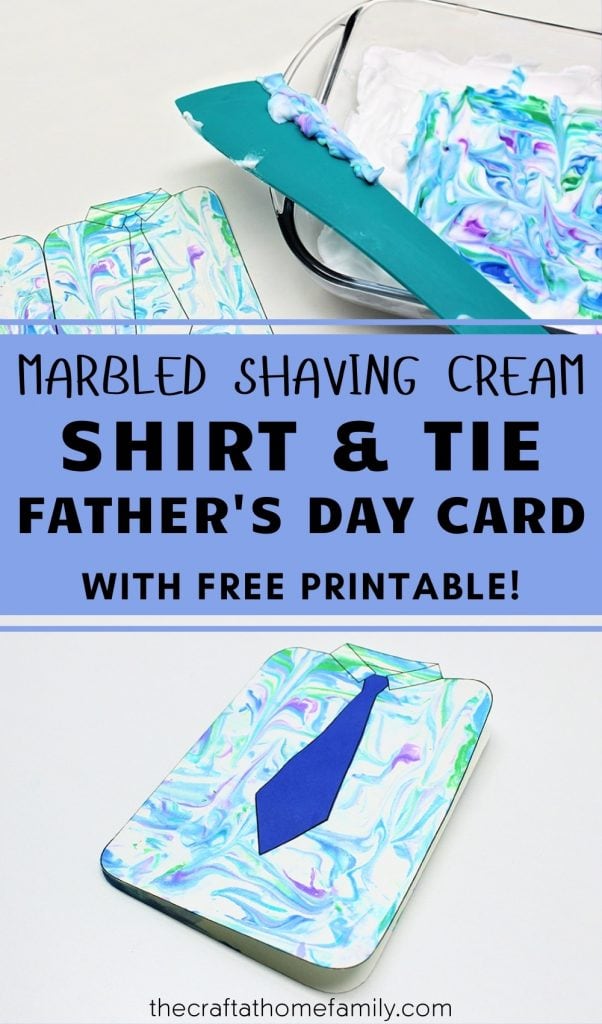
This cute shirt & tie card is made using a fun process art technique that even younger kids can help out with! It’s the perfect homemade card for Father’s Day, and it even comes with a free shirt & tie template that you can use to speed things up!
This post may contain affiliate links, which means I may receive a commission, at no extra cost to you, if you make a purchase through a link. As an Amazon Associate, I earn from qualifying purchases. Please see my full disclosure for further information.
JUMP TO…
Shaving cream marbling was one of the first activities I tried with my kids when I became a stay-at-home mom. I had seen it on Pinterest, and it looked so fun and so easy to set up that I placed it at the top of my list.
We were not disappointed. The resulting swirling pattern was so gorgeous and it doubled as a sensory activity once we were done creating the prints!
If you follow my blog, you may have seen the post on Scratch-Off Car Cards that I shared a few days ago.
It’s such a cool project, but it’s mostly aimed at older kids, and since our kids are still quite young, I wanted to come up with a project that they could actively participate in. So I thought about the art projects we’d done in the past and remembered how much fun we’d had with shaving cream marbling!
We’d previously used this technique to create abstract art, but I think it looks so beautiful as a pattern on a shirt! And the best part is that as long as you help out and take care of the steps involving cutting and glueing, even younger kids should be able to do a lot of this project themselves!
Related: Tie-Dyed Tie Father’s Day Card
Required Materials
Here’s what you’ll need to make this cute shirt & tie card for Father’s Day:
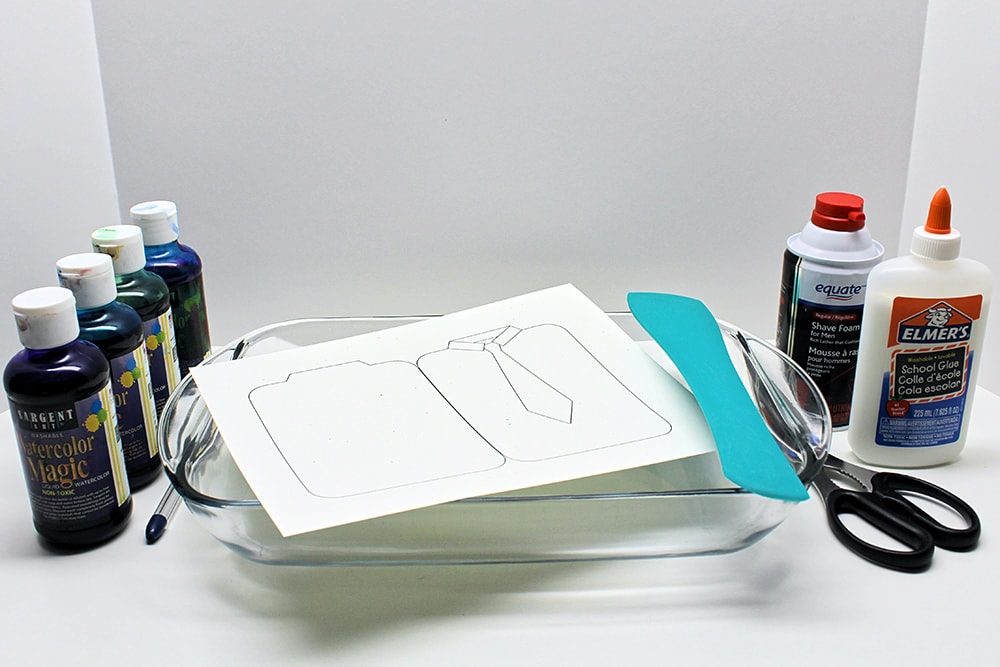
- White cardstock for the shirt (you can use coloured cardstock if you find white boring, as long as you stick with a lighter shade)
- Coloured cardstock of your choice for the tie (I used dark blue)
- My free shirt and tie printable, which you can download using the form at the bottom of this article
- Scissors
- Large casserole dish or baking sheet
- Shaving cream (we get ours at Walmart for under $2)
- Liquid watercolours or liquid food colouring
- Spatula or scraper
- White school glue
How to Make a Marbled Shaving Cream Shirt & Tie Card (Step-by-Step)
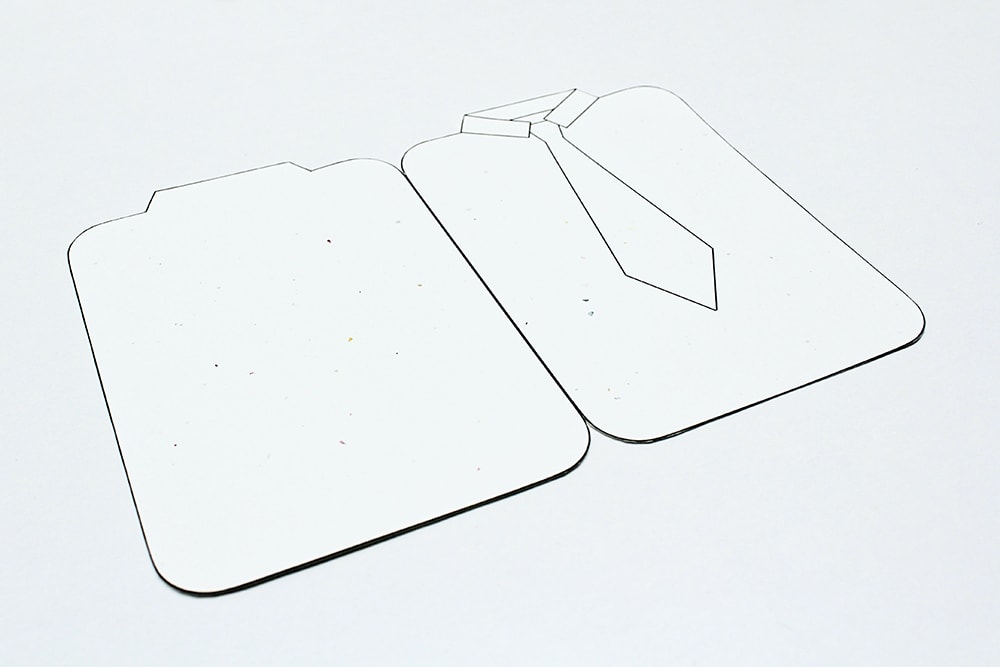
1. Print Template
Start by printing the first page of the template on a sheet of white or light-coloured cardstock. (I ran out of plain white and had to use a shade called “Stardust White”, which was covered in little specks of colour.)
2. Cut Template
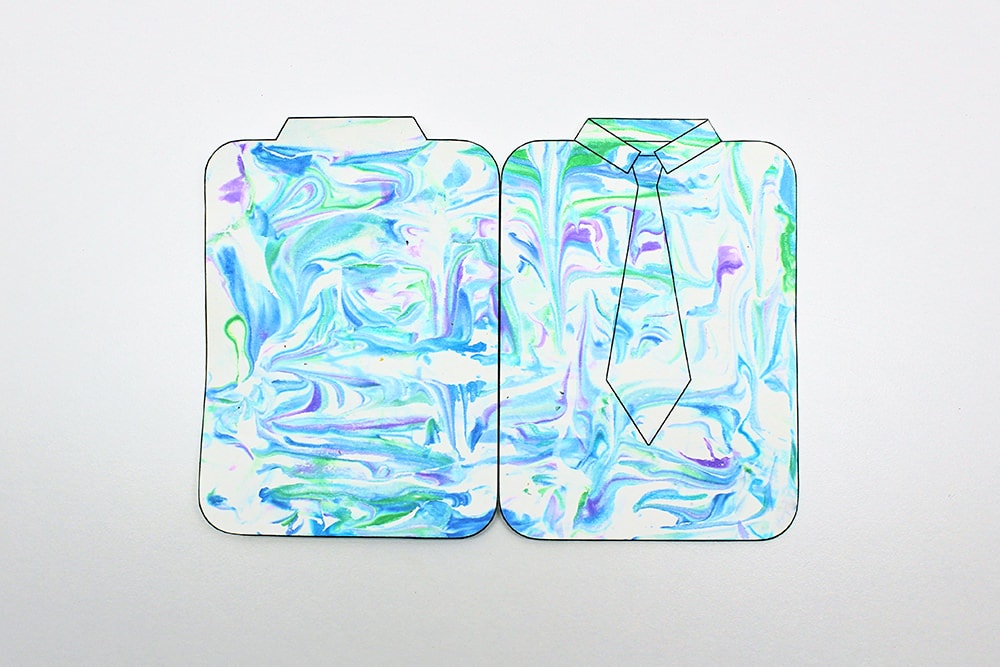
Cut out the card using scissors, making sure not to cut along the line in the middle. (You’ll be folding your card along this line once you’re done creating the prints.)
3. Prep Shaving Cream
Next, cover the bottom of a baking sheet or large casserole dish with shaving cream and use a spatula to even out its surface.
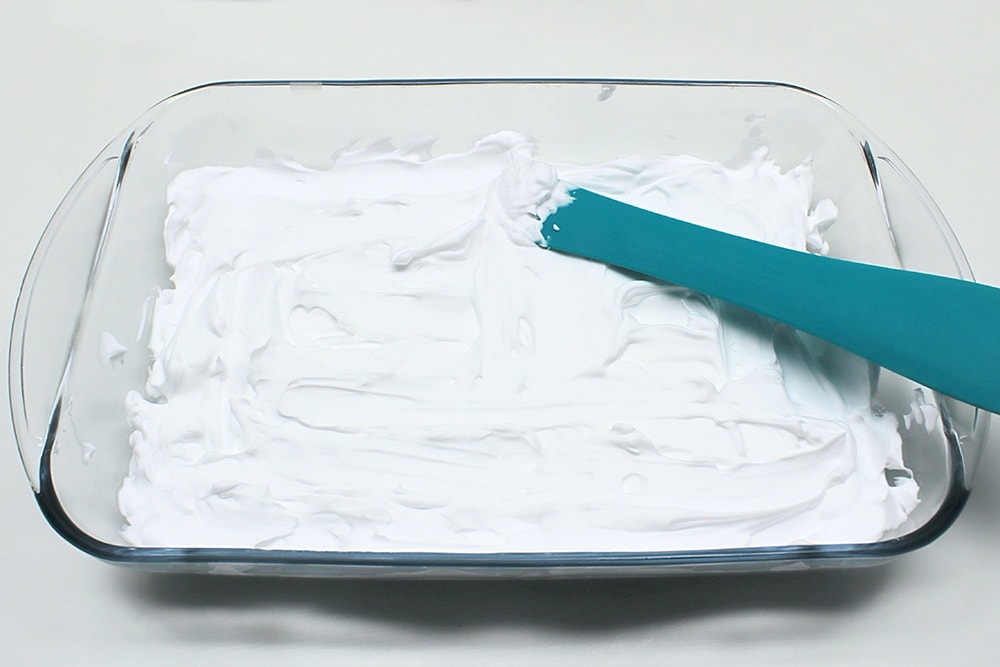
We used a lot of shaving cream so we could scrape off the top and make more prints after I was done taking pictures, but you only need enough to cover the bottom.
4. Add Colour
Once you’re done spreading out the shaving cream, grab your food colouring or liquid watercolours and sprinkle dots of colour on top. We decided to use blue, green and purple.
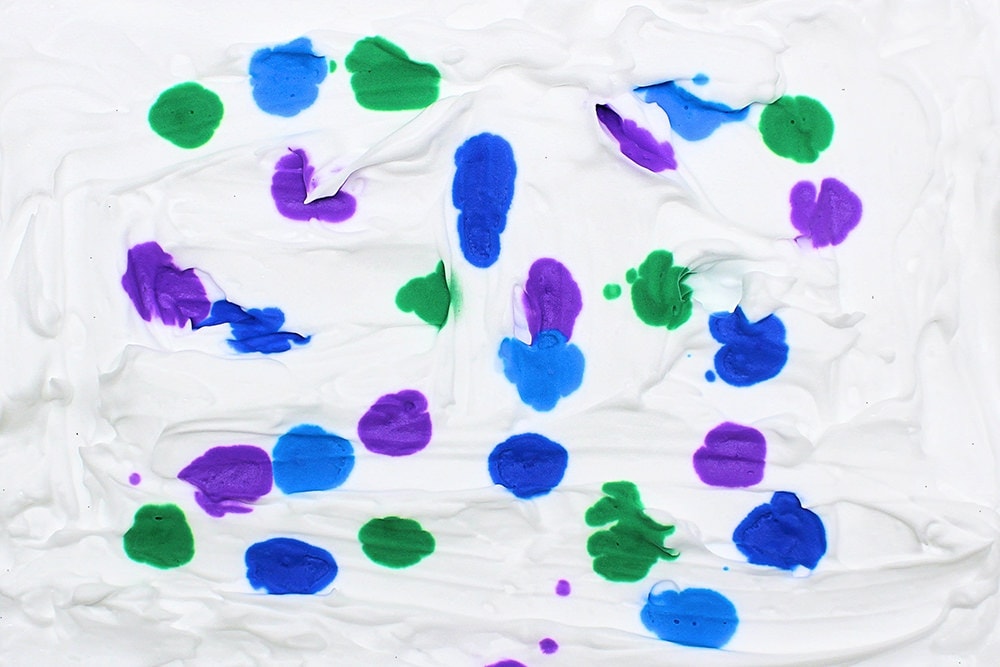
Tip: I wouldn’t recommend using more than three or four colours because they tend to get all muddy if you use too many. For best results, I also recommend using colours that are complementary to one another.
5. Swirl Colours
The next step is to swirl the colours around to create a pattern. I used the same spatula I had used to even out the surface of the shaving cream, but if that’s too difficult for your child, you could always give them something smaller to work with, like a toothpick.
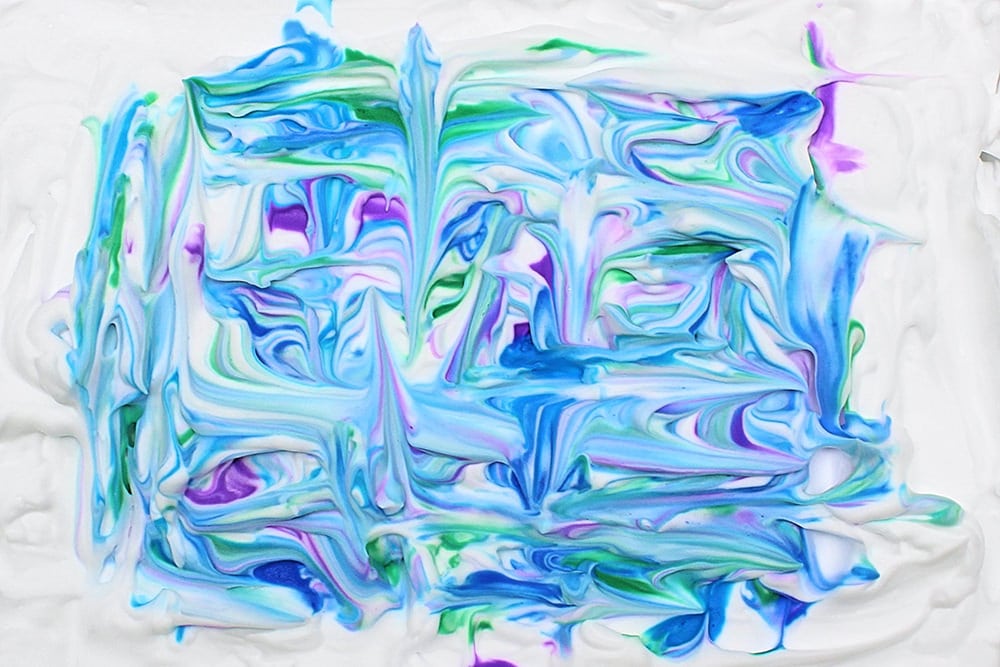
In order to create a nice pattern, you’ll want to make sure you don’t swirl the colours so much that they start to blend into one another—a few vertical and horizontal strokes of your spatula should be sufficient to create nice, clean prints.
6. Press & Scrape Template
I don’t have detailed pictures of the next couple of steps because they need to be completed as quickly as possible.
Let your child press the card into the shaving cream, printed side down. Then, quickly remove it and use your spatula to scrape off all the shaving cream.
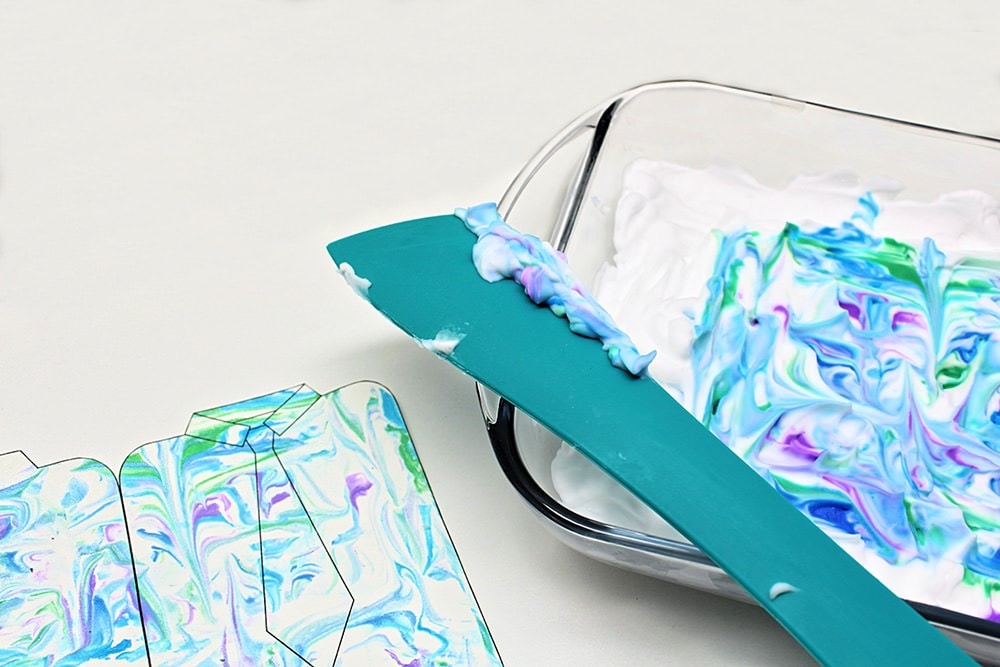
Note: You’ll want them to press down just enough for the paper to be covered. If you leave the card pressed into the shaving cream for too long, or if you wait too long to scrape off the shaving cream, you risk ending up with soggy paper and a blurry print.
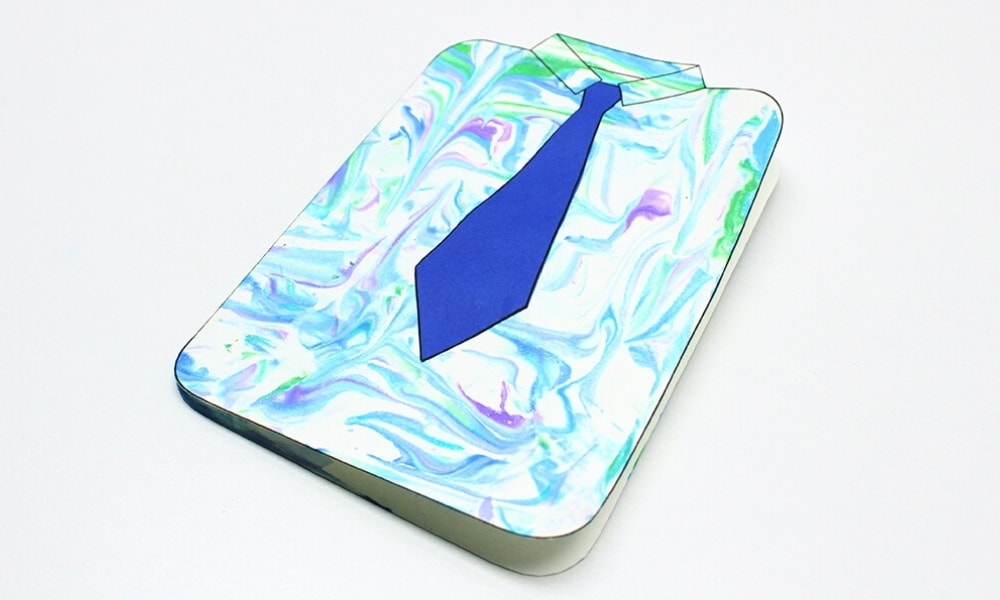
7. Print & Cut Tie
All that’s left to do is to add the tie! Print the second page of the template on a piece of dark blue cardstock (or any other colour you prefer) and use scissors to cut it out.
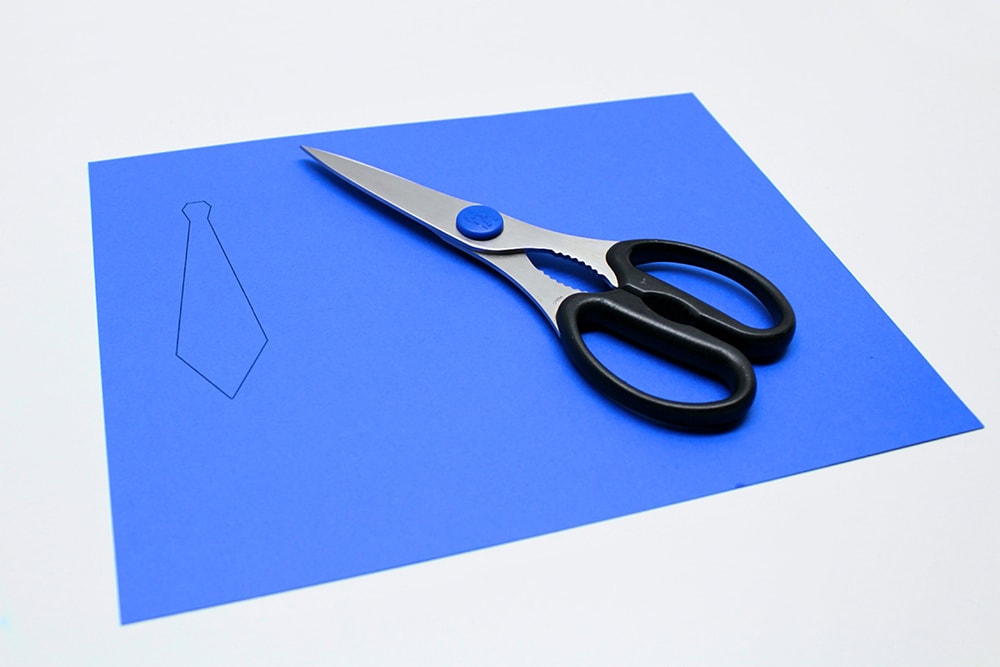
I intentionally placed the tie off to one side of the page to allow you to reuse the remainder of the sheet of cardstock for another project!
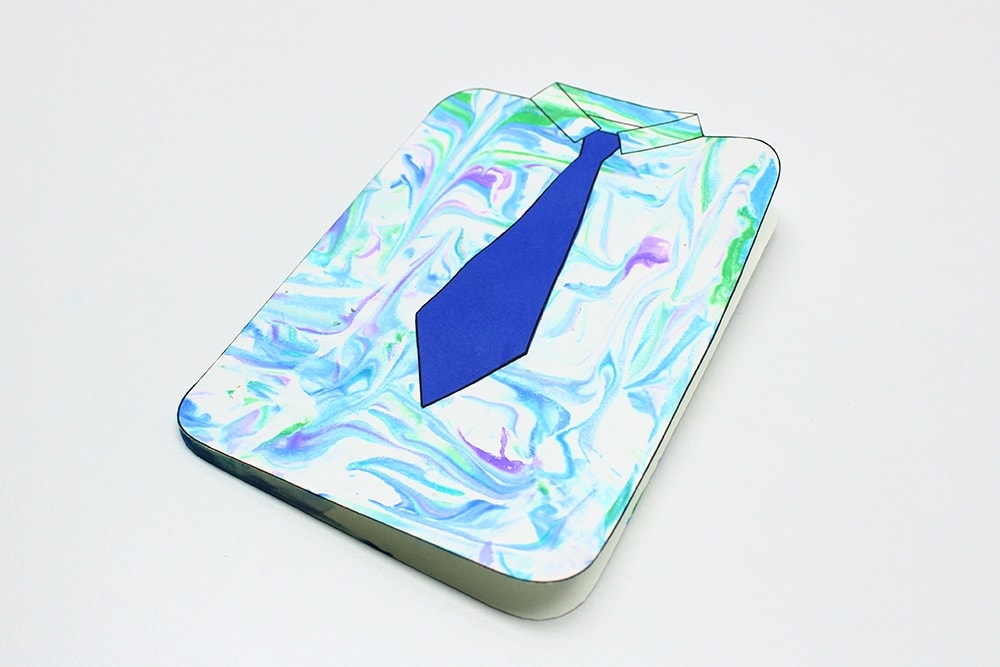
8. Glue & Fold
Once you’re done cutting the tie, glue it onto the corresponding printed lines on the front of the card. Then, fold the card along the line in the middle line and you’re done! Write whatever you want inside and wait for the perfect moment to give it to the recipient.
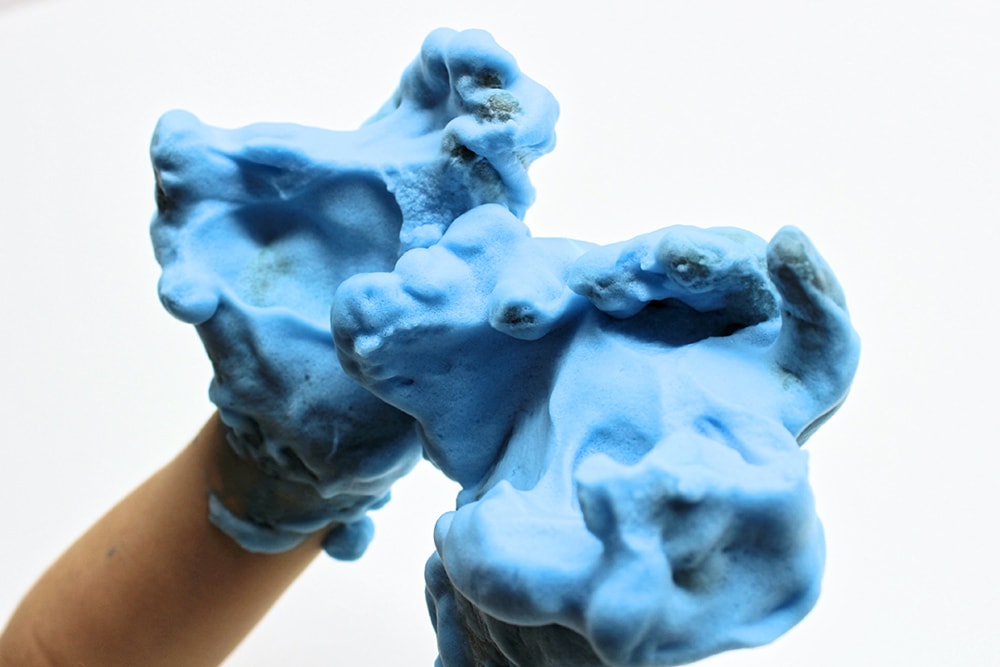
If your kids are like mine, they’ll love sticking their hands in the shaving cream for sensory play after you’re done using it to make prints! The liquid watercolours did dye my four-year-old’s hands a little bit, but the brand we use is washable, so it came right off at bath time.
Related Homemade Cards
Looking for more fun ideas of DIY cards you can make at home? Check out these articles:
- Scratch-Off Car Card (with Free Printable!)
- Scratch-Off Ladybug Card (with Free Printable!)
- Button Rainbow Card (with Free Printable!)
Join my mailing list using the form below to receive your free shirt & tie printable as a welcome gift! Subscribers gain access to my free printables library as well as to exclusive content that may never be published on my site!
That is really cool! My youngest especially has a lot of tactile sensory needs, so they would love this. Thanks for sharing!
This is a lovely fathers day card idea. The mix of colours look amazing and apt. It is a graeat way to involve the kids to paint and craft.