This colourful craft requires only a few simple materials, and it’s suitable for both younger and older kids. Find out how you can use school glue and watercolour paint to create a beautiful rainbow that you’ll be proud to hang in your window!
This post may contain affiliate links, which means I may receive a commission, at no extra cost to you, if you make a purchase through a link. As an Amazon Associate, I earn from qualifying purchases. Please see my full disclosure for further information.
JUMP TO…
This glue resist rainbow is the perfect craft to hang in your window this season!
It’s made by drawing a rainbow using school glue, then colouring it in with watercolour paint once the glue dries; the glue forms a sort of barrier that keeps the colours separate. It’s beautiful, simple to make, and great for both younger and older kids.
My three-year-old had a blast making one alongside me while I was taking pictures for this article!
Required Materials
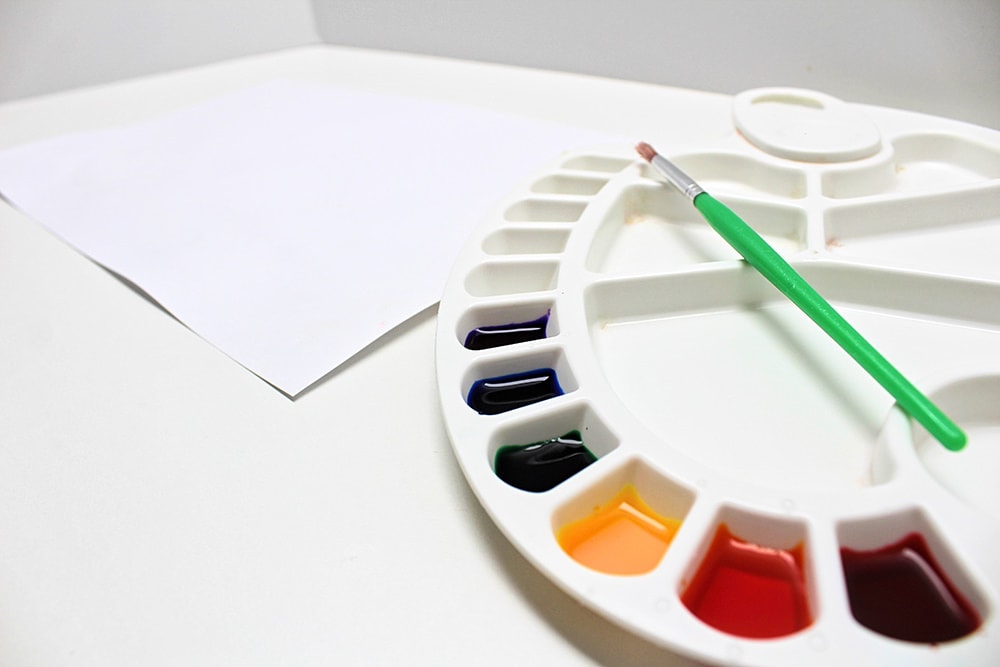
Here’s what you’ll need to make your very own glue resist rainbow using school glue and watercolour paint:
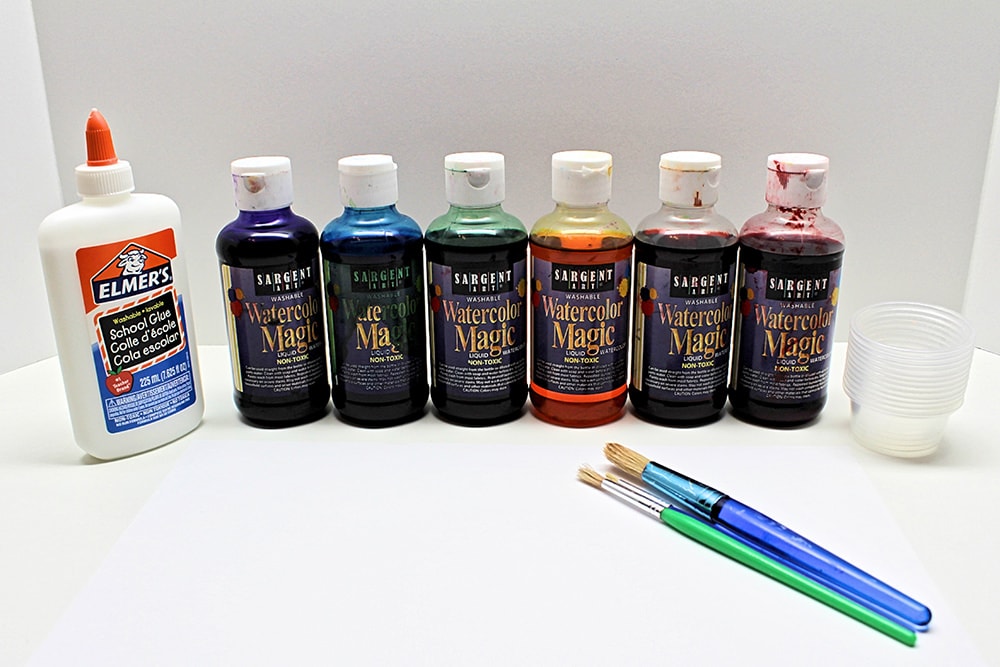
- Cardstock or kids’ watercolour paper (regular paper will get too soggy) in whatever format you like
- Bottle of white school glue with precision tip
- Liquid watercolours or kids’ watercolour paint in rainbow colours
- Paintbrushes
- Mixing palette or small containers to dilute the liquid watercolours
How to Make a Glue Resist Watercolour Rainbow (Step-by-Step)
1. Draw Clouds
Start by drawing two clouds on a sheet of cardstock or watercolour paper using school glue.
The clouds should be positioned at either end of the rainbow. Older kids might be able to do this themselves with a little help, but you’ll need to do this step on your own if your children are too young.
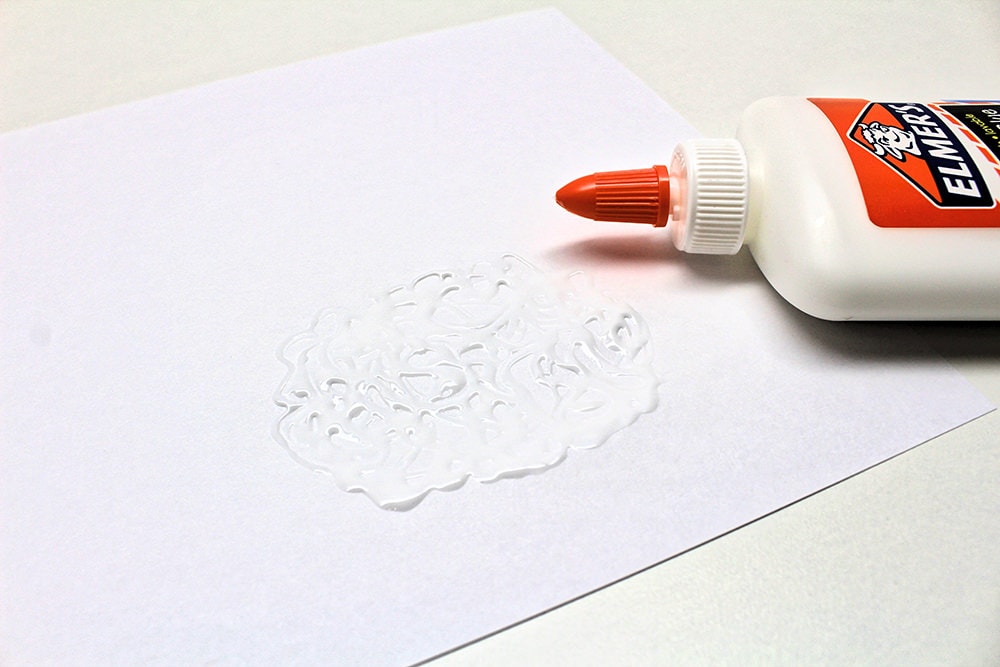
As you can see in the picture, I drew each cloud as a ball of squiggly lines. Drawing them like this rather than just tracing an outline will make the clouds look textured once the craft is done.
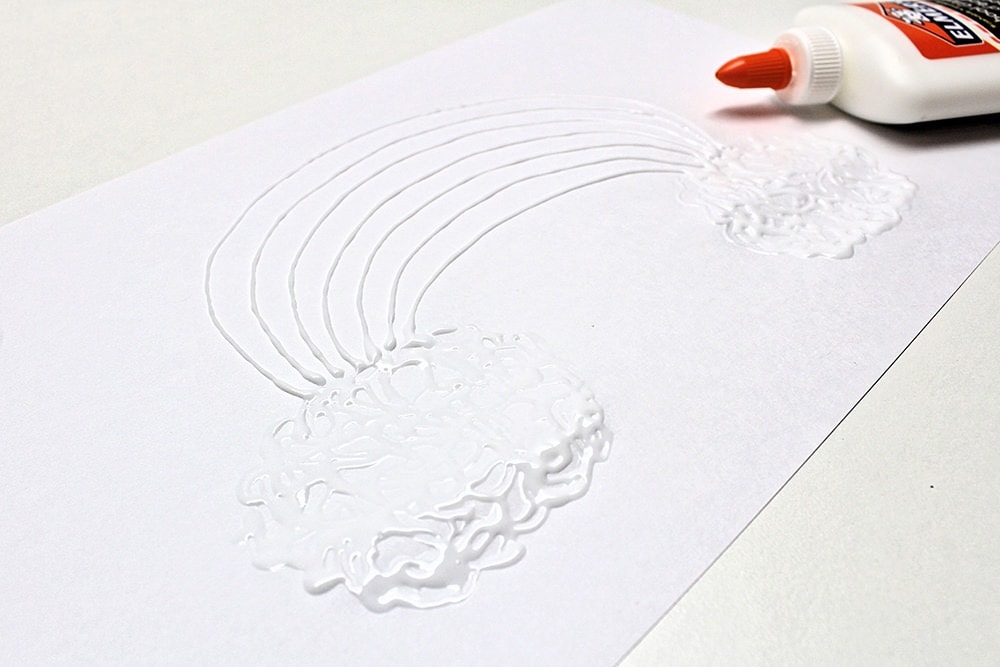
2. Draw Rainbow
Next, trace your rainbow by drawing seven curved lines connecting the two clouds. Don’t worry too much if your rainbow isn’t perfect—the craft will still turn out just fine.
3. Let Glue Dry
Wait several hours for the glue to dry. Because school glue dries clear, it became pretty difficult to photograph at this point, but it’s a lot easier to see in person as long as you have sufficient lighting.
4. Prep Watercolour Paint (Optional)
I used six colours to create my rainbow: purple, blue, green, yellow, orange and red.
Since liquid watercolours are expensive, I like to dilute them to stretch them further. If you choose to do this as well, just make sure not to dilute them too much since you want the rainbow’s colours to be nice and vibrant.
I like to use a dollar-store mixing palette to do this step. It works great because the individual wells are too small to contain much water.
Just pour several drops of liquid watercolour paint into a small quantity of water, and if you want to be sure you like the intensity of the colours before you use them to create your rainbow, test them out on a separate sheet of cardstock or watercolour paper.
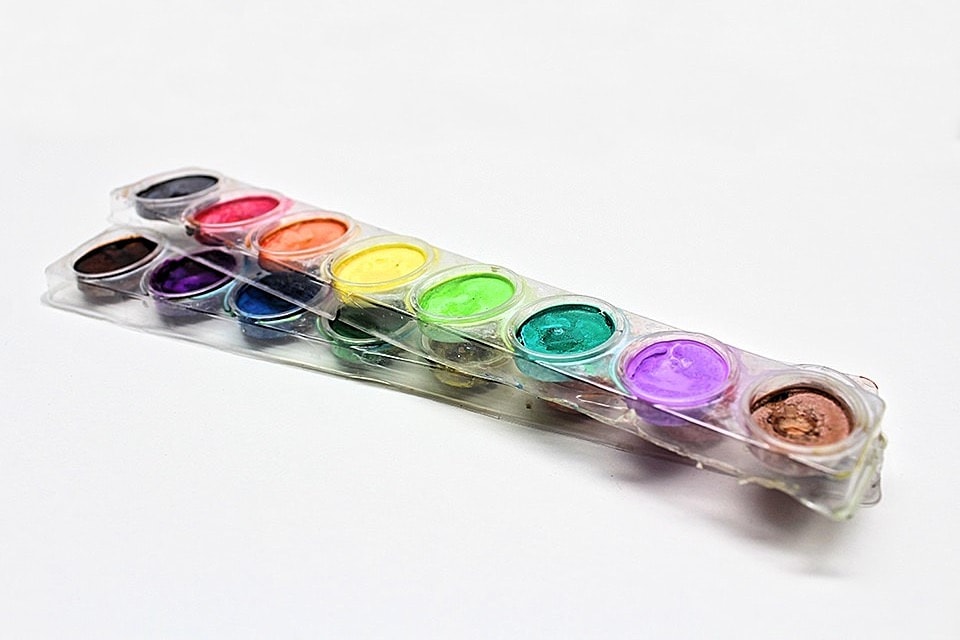
Alternatively, you could use kids’ watercolour pans such as these:
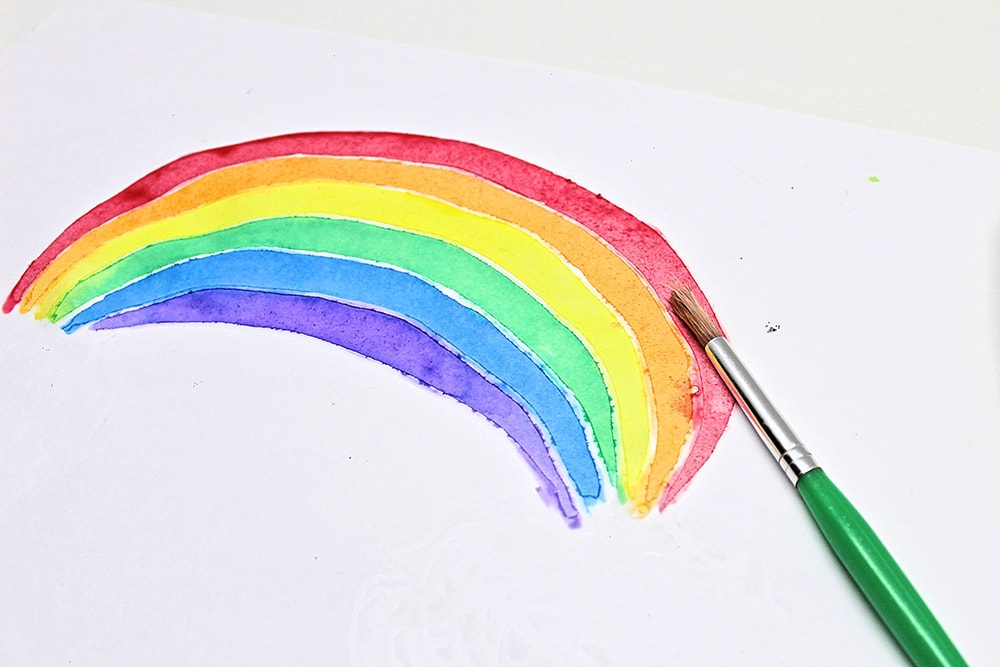
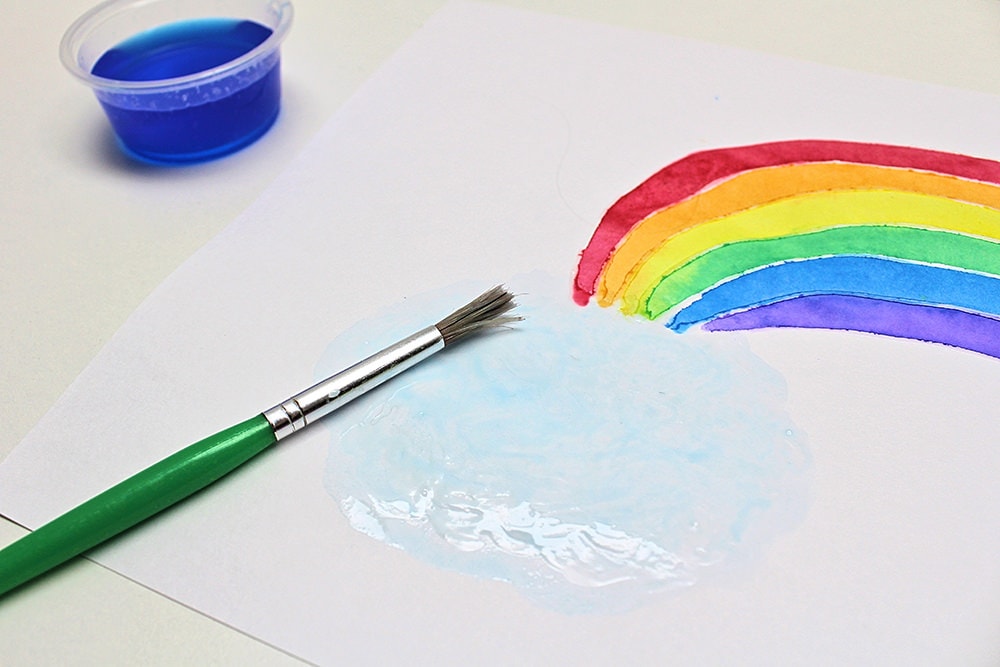
5. Paint Rainbow
To create your rainbow, all you’ll need to do is use a small paintbrush to colour in between the lines of glue.
You’ll probably get some paint on the glue, but that’s not a huge deal. The lines will still look lighter in colour than the painted areas, and you can gently pat off any excess paint with a small piece of paper towel as long as you do so before it dries.
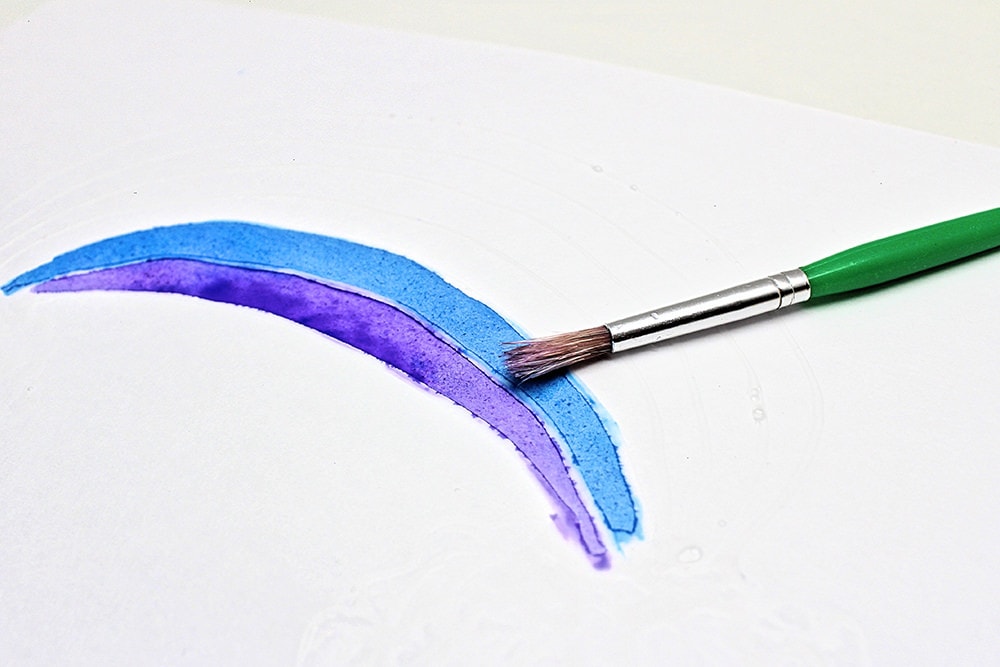
Add colours one by one until you’ve used all six. My lines are pretty neat, but obviously the younger your kids are, the less neat their rainbow will be. My three-year-old’s rainbow was a little messy, but she had lots of fun painting it!
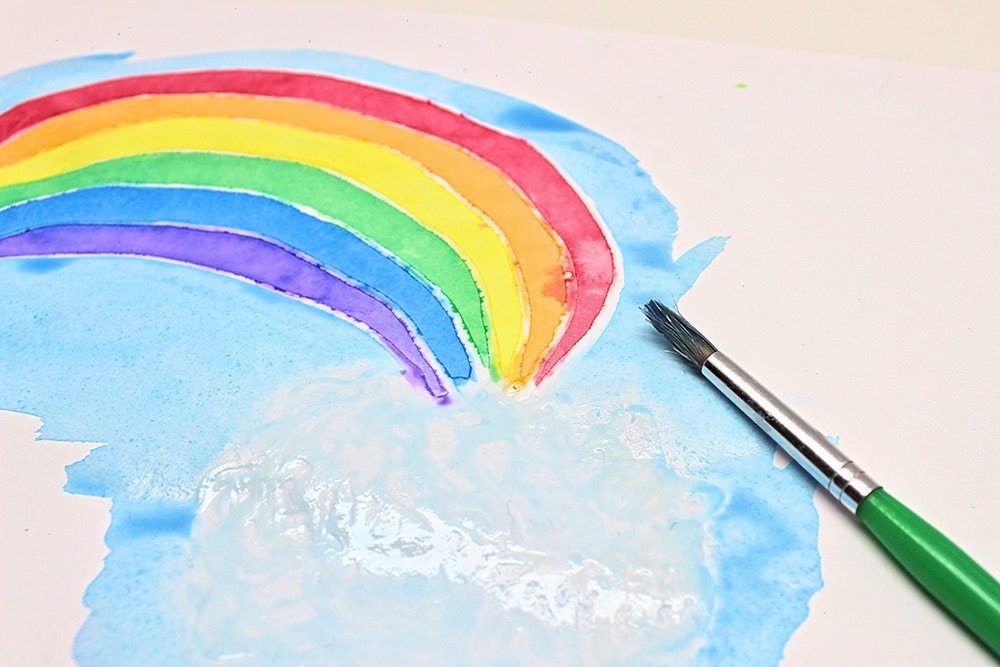
6. Paint Clouds
Once you’re done painting the rainbow, it’s time to paint the clouds.
For this step, you’ll want to use heavily diluted blue paint. The idea is to add just enough colour for the clouds to look textured without blending into the sky. Start out with less and add a little more paint as needed if the colour is too light.
I filled a small container with water and dipped my paintbrush into the concentrated colour from the rainbow a couple of times to add it to the water. You can do the same thing with kids’ watercolour paint if that’s what you’re using.
7. Paint Sky
Once you’re done painting the clouds, add a few more drops of liquid watercolour paint to the water (or switch to undiluted sky blue if you’re using kids’ watercolour paint). Like before, you can test the colour on a separate piece of paper if you want to make sure it’s the right shade of blue.
Once you’re satisfied with the colour, use it to paint the sky. I traced the lines around the rainbow and clouds using a smaller paintbrush, then switched to a broader paintbrush to finish up more easily.
8. Let Paint Dry
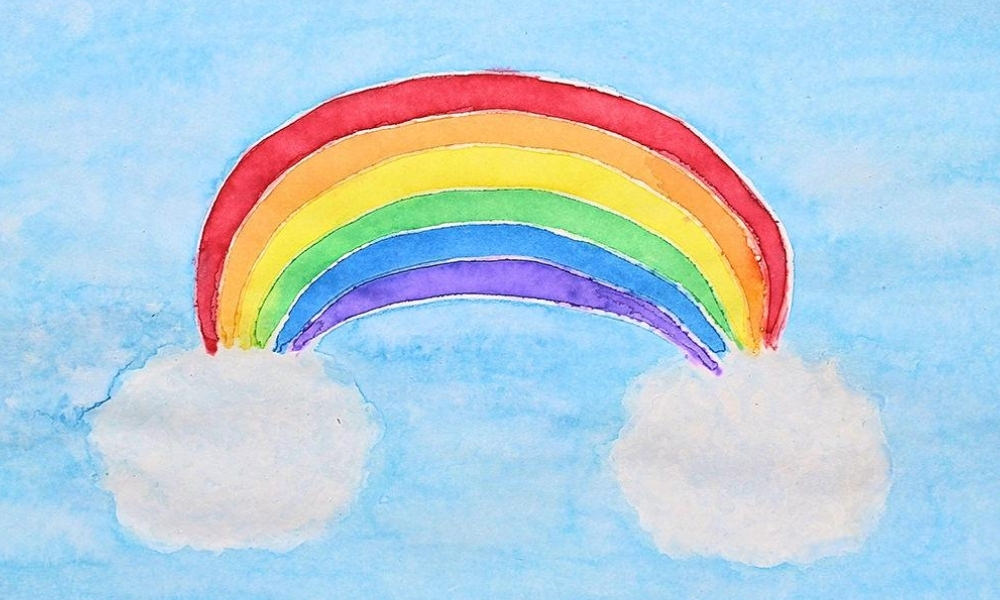
Wait for the paint to dry and you’ll end up with something like this!
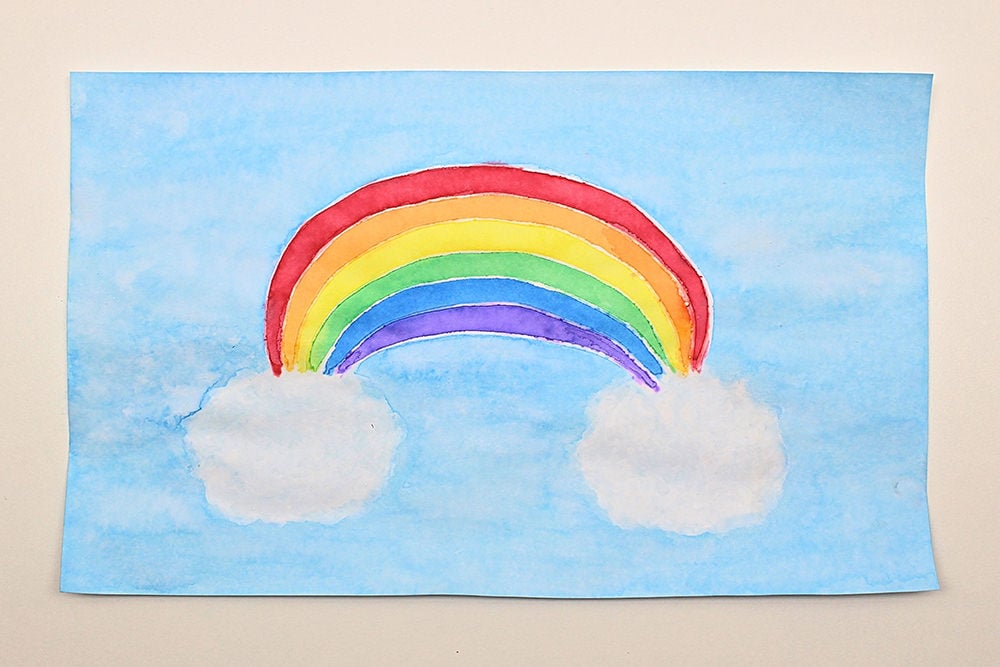
Isn’t that so pretty? My three-year-old was super excited about this project and felt inspired to keep painting rainbows on other sheets of cardstock once she was done!
I hope your kids enjoy it as much as mine did!
Related School Glue Crafts
Do you love using school glue to create beautiful artwork at home? Check out these fun projects:
- Glue and Chalk Pastel Easter Eggs (with Free Printable!)
- Raised Salt Watercolour Easter Eggs (with Free Printable!)
And did you know that you can use school glue to make awesome homemade slime for your kids?!
Want to receive more craft and activity ideas right in your inbox? Sign up for my newsletter to receive regular updates as well as exclusive content that may never be available on my site!
Only your name will be made public. Please note that by submitting your comment, you are agreeing to the terms of our Privacy Policy.